
When you buy traditional flooring, they come already cut, usually with a tongue on one side, and a groove on the other. They are also cut to various lengths so that your final floor pattern is random and not purposefully repeated. Herringbone floors are meant to be laid in a pattern so the irregular pieces of flooring have to be modified.
source/image: I Like To Make Stuff
After doing the rough math of our entryway’s square footage, I figured out that I would need over 200 pieces of flooring cut to the same length. I opened some remaining boxes of flooring and used my miter saw to cut the giant pile of pieces. Because of the nature of herringbone floors and the construction of tongue and groove flooring, I wasn’t don’t modifying these pieces yet.
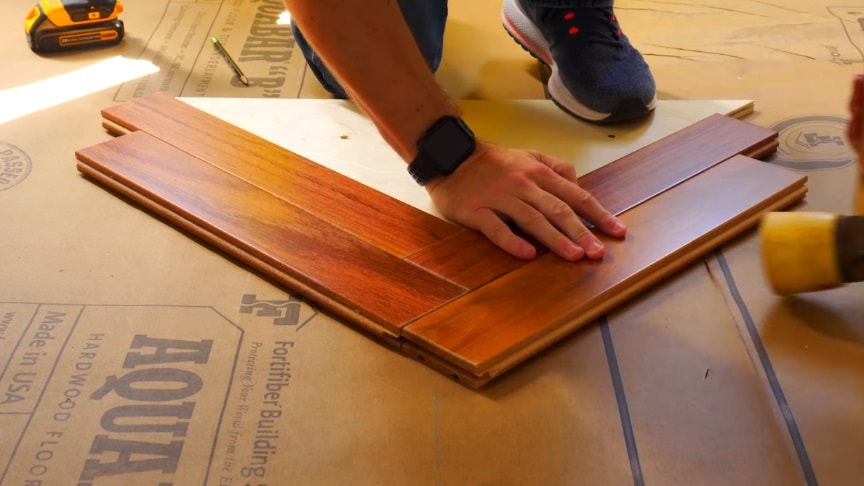
Normally, when you lay tongue and groove flooring, the tongue fits inside of the groove the whole length of the piece as well the sides. In our case I had to cut each piece the same length resulting in only groove remaining one side. Because the pieces would be paid out in 90-degree butt joints, I had to add a groove to the other side.
Advertisement
Think of it like this, one piece of flooring would lead with a tongue and another piece would butt up against the front corner. This had to be a groove or the straight cut from the miter saw would lock the pieces into place. Conversely, behind that 90-degree segment would be the original long grooves. In order to get another row of flooring to join up with those, I had to cut splines that would fit into both grooves. So yes, I had more repetitive cutting to do.To match the aesthetic of the rest of the floor, I had to add a small micro-bevel to the freshly cut end. I did this by setting up a chamfering bit in my router table and carefully passing each end over the tiny exposed cutter./read more: I Like To Make Stuff


